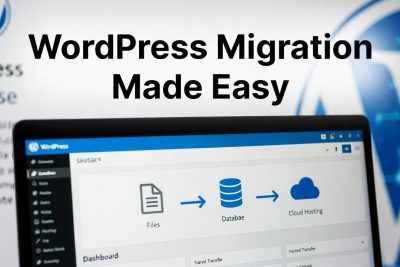
Migrating a WordPress website can seem like a daunting task, especially if it’s your first time. Many website owners face challenges during the migration process, from broken database connections to misconfigured site URLs. A failed migration can lead to downtime, loss of content, and frustrated visitors. However, with the right approach, migrating your WordPress site can be seamless and stress-free. This guide will walk you step by step through the migration process, whether you are moving to a new hosting provider or transferring your website to a different domain.
1. Why Migrate WordPress?
There are several reasons why website owners may need to migrate their WordPress site:
-
Better Performance: Your current hosting may be slow or lack resources. Migrating to a faster, more reliable host improves load times.
-
Cost Efficiency: Some hosting providers offer better pricing plans for the same or better service.
-
Advanced Features: A new hosting provider may offer features like automated backups, advanced security, or improved control panels.
-
Domain Changes: Moving a website to a new domain may be necessary for rebranding or business reasons.
Understanding your motivation for migration helps you plan accordingly and avoid mistakes.
2. Preparations Before Migration
Before moving your WordPress website, there are a few key preparations:
-
Access to Both Hosting Accounts: Ensure you have login credentials for your old and new hosting providers.
-
Control Panel Knowledge: Familiarize yourself with cPanel, Plesk, or any other control panel used by your hosting provider.
-
Backup Plan: Always create a full backup of your website before starting the migration. This protects against accidental data loss.
-
Check Site Size: Large websites with many files or large databases may require FTP uploads or specialized migration tools.
3. Step 1: Backup and Download Your WordPress Files
The first step is to back up all your WordPress files. This includes core files, themes, plugins, and media uploads.
-
Login to Your Old Hosting Control Panel
Access the control panel of your old hosting provider and navigate to File Manager. -
Locate Your WordPress Folder
Most WordPress files are stored in a folder namedpublic_htmlorhttpdocs. Within this folder, look for:-
wp-content -
wp-admin -
wp-includes -
Other WordPress files such as
wp-config.php
-
-
Compress Your Files
Select all files and compress them into a.zipor.tar.gzfile. Name it something recognizable likebackupwp.zip. -
Download the Backup
Once compressed, download the backup file to your local computer for safekeeping.
Backing up your files ensures that you have a copy in case anything goes wrong during the migration.
4. Step 2: Backup and Download Your WordPress Database
The database stores all your website content, posts, pages, users, and settings. A backup is crucial.
-
Access phpMyAdmin
Most hosting providers offer phpMyAdmin to manage databases. If not, you can use SSH withmysqldumpto export the database. -
Identify Your Database Name
Openwp-config.phpin your WordPress files to locate the database name: -
Export the Database
-
Open phpMyAdmin and select your database.
-
Click Export, choose Quick Export, and save as
.sqlfile (e.g.,your_database_name.sql).
-
This exported database file will be imported into your new hosting provider later.
5. Step 3: Upload Your Database to the New Hosting Provider
Once your database is backed up:
-
Create a New Database
-
On your new hosting, access the control panel and create a new MySQL database.
-
Create a database user and assign full privileges.
-
-
Import Your Database
-
Open phpMyAdmin on the new host and select the new database.
-
Click Import, choose your
.sqlfile, and confirm. -
You should see a message: “Import has been successfully finished.”
-
6. Step 4: Upload Your Website Files to the New Hosting Provider
4.1 Using cPanel
-
Access File Manager
Log in to your new cPanel account, navigate to File Manager, and go topublic_html. -
Upload Your Backup File
-
Upload the
.zipfile created earlier. -
Extract the files within the
public_htmlfolder.
-
-
Update
wp-config.php
Edit the configuration file to match the new database credentials:
4.2 Using Plesk Panel
-
Access Plesk File Manager
Navigate to Website & Domain > File Manager > httpdocs. -
Upload and Extract Files
Upload the.zipbackup and extract it into thehttpdocsfolder. -
Update
wp-config.php
Update database credentials as shown above.
7. Step 5: Update Your Name Server or DNS Settings
After uploading files and importing the database:
-
Update the Name Server at your domain registrar to point to the new hosting.
-
DNS propagation may take 1–24 hours.
Once propagation is complete, your website should load from the new host without downtime.
8. Migrating WordPress to a Different Domain
If you’re moving to a new domain, additional steps are required:
-
Update the
siteurlandhomevalues in thewp_optionstable in phpMyAdmin. -
Use a search-and-replace tool to update all URLs in posts, pages, and media.
9. Migrating from WordPress.com to Self-Hosted WordPress
For WordPress.com users migrating to self-hosted WordPress:
-
Export Your Content
Go to Tools > Export on WordPress.com and download your XML file. -
Import into Self-Hosted WordPress
In the new WordPress installation, go to Tools > Import and upload the XML file.
This transfers posts, pages, comments, categories, and tags.
10. Troubleshooting Common Migration Issues
Some common issues include:
-
White Screen of Death: Usually caused by plugin conflicts or missing files.
-
Database Connection Errors: Ensure database credentials in
wp-config.phpare correct. -
Broken Links or Images: Use search-and-replace to update URLs after migration.
11. Tips for a Smooth Migration
-
Always backup both files and databases.
-
Test the site on a staging environment before going live.
-
Consider using migration plugins for large or complex sites.
-
Keep your old hosting active until you confirm everything works.
Migrating WordPress to a new hosting provider doesn’t have to be complicated. By following the steps above, you can ensure a smooth transition without losing data or functionality. Whether you’re moving to a better host, changing domains, or switching from WordPress.com to self-hosted WordPress, careful planning and execution are key.