- Real‑World Use Cases for Live Camera Capture
- What You Need to Enable Live Camera Capture
- Step 1: Install and Activate WPForms Pro
- Step 2: Create a New Form
- Step 3: Add the Camera Field to Your Form
- Step 4: Configure the Camera Field
- Step 5: Advanced Camera Settings
- Step 6: Set Up Notifications and Confirmations
- Step 7: Test Your Camera Form
- Step 8: Embed the Form on Your Website
- Best Practices for Using Live Camera Capture
- Common Mistakes to Avoid
- Frequently Asked Questions (FAQ)
- 1. Can users take photos directly inside a WordPress form?
- 2. Do users need to install any extra apps to use the camera feature?
- 3. Does the live camera capture feature work on mobile devices?
- 4. Is HTTPS required for camera capture in WordPress forms?
- 5. Where are the captured photos and videos stored?
- 6. Are captured images and videos secure?
- 7. Can I limit the file size of photos or videos?
- 8. Can I restrict how long a user can record a video?
- 9. Can I customize the camera button text and style?
- 10. Is live camera capture better than traditional file uploads?
- 11. Can this feature be used for sensitive data like ID verification?
- 12. Does camera capture affect website performance?
- 13. Can I use camera capture for testimonials or user-generated content?
- 14. What happens if a user denies camera permission?
- 15. Is this feature suitable for beginner WordPress users?
For years, website owners have relied on traditional file uploads to collect images and videos from users. Whether it was profile photos, support screenshots, identity verification images, or short testimonial videos, the process usually followed the same painful pattern: users had to leave the website, open their camera app, take a photo, find it in their gallery, and then upload it back through a form. Every extra step created friction, confusion, and drop‑offs.
If you run a WordPress website, you have probably experienced this problem firsthand. Users forget to attach files, upload the wrong image, send screenshots instead of original photos, or submit files that are far too large. In some cases, they simply abandon the form altogether.
Fortunately, modern browsers now support direct camera access, which means users can take photos or record videos directly inside a web form. With the right WordPress form plugin, you can enable live camera capture so users can snap a photo or record a short video without ever leaving your site.
In this comprehensive guide, you will learn exactly how to let users take live photos and videos in WordPress forms using WPForms. We will cover why this feature matters, real‑world use cases, and a complete step‑by‑step walkthrough—from installation to testing and embedding your form.
By the end of this article, you will have everything you need to create smoother, faster, and more user‑friendly forms that dramatically improve submission rates.
Why Live Camera Capture in WordPress Forms Matters
User experience is one of the most important factors in form conversions. The easier your form is to complete, the more likely users are to finish it. Live camera capture significantly reduces friction by eliminating unnecessary steps.
Reduced Friction and Higher Completion Rates
When users are asked to upload a photo manually, they must:
- Leave the form
- Open their camera app
- Take a photo
- Close the camera
- Find the photo in their gallery
- Return to the browser
- Upload the file
Each step increases the chance of abandonment. With live camera capture, the entire process happens inside the form. Users click one button, grant camera access, and capture the media instantly.
Many website owners report noticeable increases in form completion rates after switching from traditional uploads to live camera fields.
Better Quality Submissions
Live capture encourages users to submit original images instead of screenshots or compressed copies. This leads to:
- Clearer profile photos
- More readable documents
- Higher‑quality support images
- More authentic video submissions
Improved Organization
All captured photos and videos are automatically attached to the form entry. You no longer need to search through email inboxes or match files manually with submissions.
Real‑World Use Cases for Live Camera Capture
Live camera capture is not just a novelty feature. It has practical applications across many industries.
Customer Support and Technical Help
Instead of describing an issue in words, users can show the problem directly. A quick photo or video often explains more than a long paragraph of text.
Real Estate and Property Management
Tenants can photograph maintenance issues immediately. Property managers receive visual evidence without endless email threads.
Education and Online Learning
Schools and eLearning platforms can collect student photos during admissions or registration without asking parents to email files separately.
Insurance and Claims Processing
Customers can submit photos of damage on the spot, speeding up claim assessments and reducing delays.
Membership Sites and Communities
New users can take profile photos during registration, ensuring consistency and better image quality.
What You Need to Enable Live Camera Capture
To add live camera capture to WordPress forms, you need:
- A WordPress website
- HTTPS (SSL certificate) enabled
- A form plugin that supports camera capture
In this guide, we will use WPForms Pro, one of the most powerful and beginner‑friendly WordPress form plugins available.
Step 1: Install and Activate WPForms Pro
WPForms is a drag‑and‑drop form builder designed for beginners and professionals alike. It supports advanced features such as conditional logic, file uploads, payment integrations, and live camera capture.
Installing the Plugin
- Log in to your WordPress dashboard
- Go to Plugins » Add New
- Search for WPForms
- Click Install Now, then Activate
If you are using WPForms Pro, download the plugin ZIP file from your WPForms account and upload it manually.
Activating Your License
- Navigate to WPForms » Settings
- Paste your license key
- Click Verify Key
Once activated, you will have access to all Pro features, including the Camera field.
Step 2: Create a New Form
To build your form:
- Go to WPForms » Add New
- Enter a name for your form
- Choose a template or start from a blank form
WPForms offers over 2,000 pre‑built templates, including contact forms, registration forms, and support request forms.
For beginners, the Simple Contact Form template is an excellent starting point.
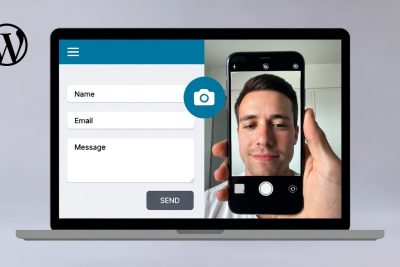
Step 3: Add the Camera Field to Your Form
Once the form builder opens:
- Look at the left panel with available fields
- Scroll to Fancy Fields
- Drag and drop the Camera field into your form
A camera icon will appear in the form preview. This is what users will click to capture photos or videos.
On desktop devices, users will see a short countdown before capture, giving them time to adjust their position.
Step 4: Configure the Camera Field
Click on the Camera field to open its settings.
Label and Description
Rename the field to match its purpose, such as:
- Profile Photo
- Damage Image
- Verification Video
Use the description field to add helpful instructions, such as lighting tips or framing requirements.
Choose Photo or Video Format
WPForms allows you to select:
- Photo for still images
- Video for short recordings
Choose the format that best fits your use case.
File Size and Time Limits
You can:
- Set a maximum file size (in MB)
- Limit video recording duration
Shorter videos help reduce server load and improve performance.
Required Field Option
Enable the Required toggle if users must submit a photo or video to complete the form.
Step 5: Advanced Camera Settings
Switch to the Advanced tab for additional customization.
Button Style and Text
You can display the camera trigger as:
- A button with an icon
- A simple text link
Customize the button text to make it more engaging, such as:
- “Take Your Photo”
- “Record a Quick Video”
Custom CSS Classes
Add custom CSS classes if you want to style the camera button differently using your theme’s CSS.
File Storage Options
By default, files are stored in the WPForms uploads directory. You can also:
- Save files to the WordPress Media Library
- Connect cloud storage services like Google Drive or Dropbox
Restrict File Access
For sensitive uploads, enable file access restrictions so only authorized users can view the files. You can also add password protection.
Step 6: Set Up Notifications and Confirmations
Email Notifications
Configure notifications so you are alerted when someone submits the form. You can:
- Send notifications to multiple recipients
- Include links to uploaded photos or videos
- Use smart tags for dynamic email routing
Confirmation Messages
Choose what users see after submitting the form:
- A success message
- A redirect to another page
- A custom thank‑you page
Clear confirmations reassure users that their submission was successful.
Step 7: Test Your Camera Form
Before publishing:
- Save the form
- Preview it
- Test camera permissions in your browser
- Submit a test entry
Make sure your site uses HTTPS, as browsers block camera access on non‑secure sites.
Check the entry inside WPForms » Entries to confirm the photo or video was captured correctly.
Step 8: Embed the Form on Your Website
WPForms makes embedding easy:
- Click Embed
- Choose an existing page or create a new one
- Adjust form display settings
- Publish the page
Your live camera form is now ready for real users.
Best Practices for Using Live Camera Capture
- Keep instructions clear and short
- Set reasonable file size limits
- Use video capture only when necessary
- Secure sensitive uploads
- Test across devices and browsers
Common Mistakes to Avoid
- Forgetting to enable HTTPS
- Allowing overly large video uploads
- Not testing mobile compatibility
- Leaving sensitive files publicly accessible
Allowing users to take live photos and videos directly inside WordPress forms is one of the simplest ways to improve user experience and increase form conversions. By removing friction and simplifying the submission process, you make it easier for users to complete your forms accurately and quickly.
With WPForms Pro, adding this feature is straightforward—even for beginners. From customer support and property management to education and insurance, live camera capture opens up powerful new possibilities for collecting visual information.
If you want faster submissions, higher‑quality uploads, and happier users, live camera capture is a feature worth implementing today.
Frequently Asked Questions (FAQ)
1. Can users take photos directly inside a WordPress form?
Yes. With the right plugin (such as WPForms Pro), users can take photos or record videos directly from their device’s camera without leaving the form.
2. Do users need to install any extra apps to use the camera feature?
No. The camera works directly in the browser using built-in device camera access. Users only need to allow camera permissions.
3. Does the live camera capture feature work on mobile devices?
Yes. It works on smartphones, tablets, laptops, and desktops that have a camera, as long as the browser supports camera access.
4. Is HTTPS required for camera capture in WordPress forms?
Yes. Most modern browsers require HTTPS (SSL) for camera access. Without SSL, the camera feature may be blocked.
5. Where are the captured photos and videos stored?
Captured files are stored in the WordPress uploads folder by default. You can also choose to store them in the WordPress Media Library or external cloud storage like Google Drive or Dropbox.
6. Are captured images and videos secure?
Yes, as long as proper access restrictions are enabled. You can limit file access to logged-in users or protect files with passwords to prevent unauthorized viewing.
7. Can I limit the file size of photos or videos?
Yes. You can set a maximum file size for camera uploads to control storage usage and improve site performance.
8. Can I restrict how long a user can record a video?
Yes. For video capture, you can set a time limit (for example, 30 seconds or 1 minute) to prevent large file uploads.
9. Can I customize the camera button text and style?
Absolutely. You can change the button text (e.g., “Take Photo” or “Record Video”) and apply custom CSS classes for styling.
10. Is live camera capture better than traditional file uploads?
In many cases, yes. Live camera capture reduces friction, improves user experience, and increases form completion rates because users don’t need to upload files manually.
11. Can this feature be used for sensitive data like ID verification?
Yes, but you should enable access restrictions and avoid storing sensitive files in the public Media Library without protection.
12. Does camera capture affect website performance?
Minimal impact if file size limits are set properly. However, large video files can affect storage and performance if not managed carefully.
13. Can I use camera capture for testimonials or user-generated content?
Yes. Many site owners use it for video testimonials, profile photos, support requests, and verification purposes.
14. What happens if a user denies camera permission?
If permission is denied, the camera will not open, and the user will need to allow access manually from their browser settings.
15. Is this feature suitable for beginner WordPress users?
Yes. Most plugins offering camera capture use drag-and-drop builders, making them easy to set up without coding.