Every day billions of photos are captured on smartphones. Most of them start their life on an iPhone. Many of them eventually need to reach a Windows computer—for backup, editing, printing, sharing with family, work presentation, archiving, or simply freeing up space on the phone.
Yet despite massive improvements in both iOS and Windows over the last decade, the simple act of moving photos from iPhone to PC still feels unnecessarily complicated for millions of users. People are still:
- searching for the correct cable
- dealing with quality degradation from email or messaging
- hesitating to log into personal cloud accounts on shared or work computers
- creating duplicate chaos across folders
- wasting far more time than should ever be necessary for such a basic task
The good news in 2026 is very good. The ecosystem has matured significantly. USB-C iPhones are now the norm, Windows 11/12 has dramatically better native iPhone support, wireless direct transfer tools are excellent, and cloud services finally offer sensible high-quality + privacy options.
This long-form, practical guide examines every major transfer method that actually works well in 2026—from the fastest & most private (USB) to the most convenient wireless/cloud solutions. We will also cover the realistic pros/cons, hidden traps, quality preservation rules, and quick decision framework so you can choose the best method for your exact situation in under 30 seconds.
The Real Pain Points Most People Still Experience in 2026
Even today the most common complaints remain surprisingly similar:
- “I can never find the right cable / adapter”
- “The photos arrive very compressed / poor quality”
- “I don’t want to log into my personal iCloud / Google account on this work computer”
- “After transfer I have 3–4 copies of everything in different folders”
- “The process feels different every time I need to do it”
All five of these classic frustrations can now be almost completely eliminated—but only if you choose the correct method for your specific use-case.
Quick Decision Framework — Which Method Is Best for You? (30-second test)
Ask yourself these four questions—the first two are usually decisive:
- Do I care very strongly about maximum privacy and zero cloud involvement? → Choose USB cable (fastest & most private)
- Do I want completely wireless transfer and I accept using a trusted cloud? → Choose Google Photos (highest quality + easiest) or iCloud for Windows
- I want wireless, but I refuse to use any cloud service at all → Choose LocalSend or Snapdrop (best modern direct wireless options)
- I only transfer very small number of photos very rarely → Just use AirDrop → iCloud.com or Telegram/Google Drive high quality send
Now let’s look at each serious method in detail—updated for the current iOS 18+ / Windows 11/12 reality of early 2026.
Method 1 – USB Cable Transfer (Still the Fastest, Highest Quality & Most Private)
Best for:
- Large number of photos
- Maximum quality preservation
- Highest privacy (no internet, no login)
- Fastest transfer speed
What you need
- iPhone 15 / 16 series (USB-C) or older Lightning iPhone + proper cable/adapter
- Windows 10 / 11 / 12 computer
- Only one cable (no extra software needed in most cases)
Method A – Using File Explorer (Simplest & Recommended)
- Connect iPhone to PC using USB-C cable (or Lightning + adapter)
- Unlock iPhone → tap Trust this computer
- Open File Explorer
- iPhone will appear as device in left sidebar (usually named “Apple iPhone”)
- Double-click → open Internal Storage → open DCIM folder
- Choose subfolder (usually 100APPLE, 101APPLE etc)
- Select photos (Ctrl+A for all / Ctrl+click for specific)
- Copy (or drag) to any folder on your PC
- Very important: Right-click iPhone in sidebar → Eject before unplugging
Method B – Using Windows Photos app (Better preview & selection)
- Connect & trust iPhone
- Open Photos app (pre-installed)
- Click Import (top right)
- Windows automatically detects iPhone
- Select photos you want (or Import all new items)
- Choose destination folder
- Click Import
- Eject iPhone safely after finished
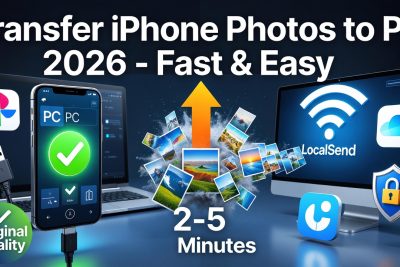
Real-world speed example (2026): ~500 high-resolution photos (HEIC ~4–6 MB each) usually transfers in 2–5 minutes depending on cable quality.
USB transfer remains the gold standard whenever you want speed + privacy + original quality.
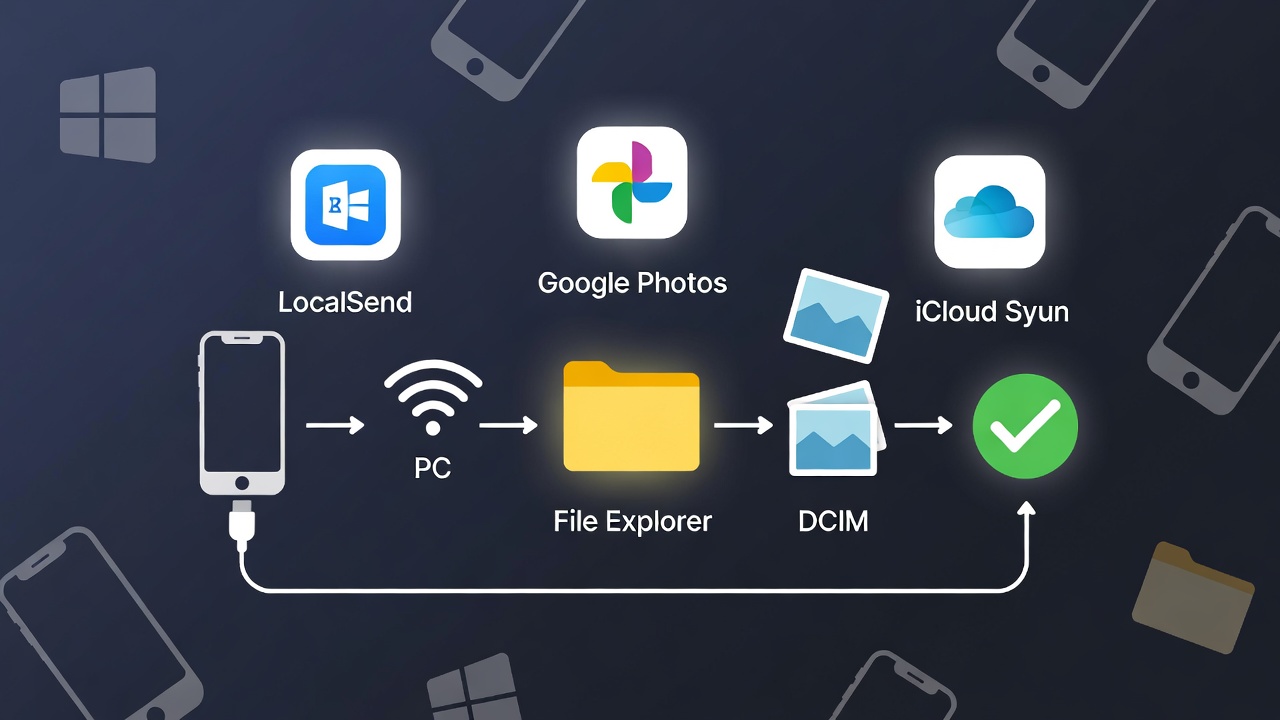
iPhone appearing directly in Windows File Explorer with DCIM folder open — still the fastest and most private way in 2026
Method 2 – Cloud Services (Most Convenient Wireless Option)
Best for:
- People who want automatic backup anyway
- Wireless transfer from anywhere
- Access photos from multiple computers
Top 3 realistic choices in 2026
A. Google Photos (usually the best overall balance)
- Install Google Photos on iPhone
- Sign in → enable Backup & sync → choose Original quality (very important!)
- On PC: go to photos.google.com or install Google Drive desktop app
- Select photos → Download (or let the whole library sync to PC folder if you want)
B. iCloud Photos + iCloud for Windows
- On iPhone: Settings → [your name] → iCloud → Photos → turn on
- On PC: Install iCloud for Windows from Microsoft Store
- Sign in → enable Photos
- iCloud Photos folder appears in File Explorer — photos sync automatically
C. Microsoft OneDrive (very good if you already live in Microsoft ecosystem)
- Install OneDrive app on iPhone
- Enable Camera Upload
- Photos appear in OneDrive → Pictures → Camera Roll
Quality rule (very important in 2026): Always choose Original quality / High quality (no compression) setting. Many people still lose quality because they left the default “storage saver” mode on.
Pros of cloud: Wireless, accessible anywhere, automatic backups. Cons: Requires internet, login, potential compression (unless high-quality setting), privacy concerns on shared PCs.
Cloud photo transfer example — Google Photos web interface showing original quality download options — convenient for wireless bulk transfer.
Method 3 – Modern Direct Wireless Transfer (No Cloud, No Cable)
Best privacy-focused wireless solution in 2026:
LocalSend (free, open-source, excellent)
- Install LocalSend on iPhone (App Store)
- Install LocalSend on PC (localsend.org — very small app)
- Make sure both devices are on the same Wi-Fi
- Open LocalSend on both → select photos on iPhone → Send → choose PC
- Accept on PC → files arrive in chosen folder
Alternative good options
- Snapdrop (browser-based — no installation)
- SHAREit / Xender (still popular but more ads)
Pros: No internet beyond local Wi-Fi, no account/login, full quality, end-to-end encrypted locally. Cons: Both devices must be on same Wi-Fi network.
Direct wireless transfer using LocalSend app — best privacy-focused cable-free method in 2026
Quick Comparison Table – Choose Your Method in Seconds
| Method | Speed | Quality | Privacy | Internet needed | Cable needed | Best for |
|---|---|---|---|---|---|---|
| USB File Explorer | ★★★★★ | ★★★★★ | ★★★★★ | No | Yes | Bulk, privacy, speed |
| Windows Photos app | ★★★★ | ★★★★★ | ★★★★★ | No | Yes | Better preview & selection |
| Google Photos | ★★★ | ★★★★★* | ★★★ | Yes | No | Wireless + automatic backup |
| iCloud + Windows app | ★★★ | ★★★★★ | ★★★★ | Yes | No | Apple users who already pay iCloud |
| LocalSend | ★★★★ | ★★★★★ | ★★★★★ | No (same Wi-Fi) | No | Wireless + maximum privacy |
*if you choose Original quality
Final Quick Tips for Perfect Transfers in 2026
- Always use original quality setting when using cloud
- Use USB whenever you transfer >100 photos or care about privacy
- After transfer run duplicate finder (Windows has built-in, or use free Duplicate Cleaner)
- Keep at least one automatic cloud backup (Google Photos / iCloud) for disaster protection
- Update your iPhone and Windows regularly — photo transfer support keeps improving
Transferring photos from iPhone to PC has never been easier — once you pick the method that fits your lifestyle.
FAQ: How to Transfer Photos from iPhone to PC (2026 Edition)
1. What is the fastest way to transfer photos from iPhone to PC?
The fastest and highest-quality method is still USB cable using File Explorer or the Windows Photos app.
- Connect iPhone → Trust computer → Open File Explorer → DCIM folder → copy photos. Takes 2–5 minutes for hundreds of photos, no compression, no internet needed.
2. Can I transfer photos wirelessly without using any cloud service?
Yes—use LocalSend (free, open-source, no account required).
- Install LocalSend on iPhone (App Store) and PC (localsend.org).
- Connect both to same Wi-Fi → select photos → send directly. Full original quality, end-to-end encrypted locally, no cloud involved. Alternatives: Snapdrop (browser-based, no install) or Microsoft Phone Link (limited to recent photos).
3. Does Google Photos compress photos when transferring to PC?
Only if you leave the default “Storage saver” setting on. Always choose Original quality in Google Photos settings on iPhone. Then on PC (photos.google.com or Google Drive desktop app), downloaded files are full resolution, identical to originals.
4. How do I transfer photos from iPhone to PC without iTunes?
You don’t need iTunes at all in 2026.
- Use File Explorer (most simple)
- Use Windows Photos app (built-in)
- Use iCloud for Windows (free from Microsoft Store)
- Or wireless methods above. iTunes is optional and mostly legacy now.
5. Why do my photos look blurry/low quality after transfer?
Common causes:
- Cloud service compression (Google Photos “Storage saver”, iCloud optimized storage)
- Email/messaging apps downscaling images
- Windows Photos app default import settings
Fix:
- Use USB method (guaranteed original quality)
- In cloud apps: always select “Original quality” / “High quality”
- Download directly from iCloud.com or photos.google.com (not via email)
6. How do I transfer photos from iPhone to PC without losing HEIC/HEVC files?
HEIC (iPhone default format) transfers perfectly via:
- USB (File Explorer or Photos app) — Windows 11/12 natively supports HEIC
- Google Photos / iCloud (original quality mode)
- LocalSend / Snapdrop
If Windows can’t open HEIC:
- Install HEIF Image Extensions from Microsoft Store (free) Or convert to JPG during transfer (Photos app option).
7. Can I transfer photos from iPhone to PC using USB-C cable directly?
Yes—iPhone 15/16 series use USB-C, so:
- Use USB-C to USB-C cable (best)
- Or USB-C to USB-A cable (most PCs still have USB-A ports) No adapter needed if both ends match. Works exactly like described in File Explorer / Photos app methods.
8. Is it safe to use third-party apps like LocalSend or Snapdrop?
Yes—both are highly trusted:
- LocalSend: Open-source, no account, local Wi-Fi only, end-to-end encrypted.
- Snapdrop: Browser-based, no install, peer-to-peer.
No data leaves your local network. Safer than cloud for privacy-sensitive transfers.
9. How do I avoid duplicates after transferring photos multiple times?
- Use Windows Photos app — it tracks “new items only”
- After transfer, use Duplicate Cleaner (free version) or Windows built-in duplicate finder
- In cloud apps: enable “Upload only new photos” settings
10. Which method is best if I transfer photos very frequently?
USB cable (File Explorer) — fastest, no setup after first time. Or LocalSend if you hate cables. Set up once, then it’s just connect/send every time.
11. Can I transfer photos from PC back to iPhone the same way?
- USB: Yes, copy files to iPhone’s DCIM folder (but not recommended—use cloud or iTunes sync instead).
- Cloud: Yes—upload to Google Photos/iCloud/OneDrive, they auto-sync back to iPhone.
- LocalSend: Yes—two-way, works both directions.
12. Why does my iPhone not appear in File Explorer when connected?
Common fixes:
- Unlock iPhone and tap Trust
- Try different USB cable/port
- Restart both devices
- Update Windows & iOS
- Install Apple Mobile Device USB Driver via iTunes (if missing)
13. How do I transfer Live Photos or videos without losing quality?
- USB method preserves everything (Live Photos, videos, HDR, etc.)
- Cloud: Google Photos and iCloud both support original quality for videos/Live Photos
- Avoid email/messaging apps—they compress heavily
14. Is there a built-in wireless method on Windows for iPhone?
Yes—Microsoft Phone Link (Windows 11/12):
- Link iPhone → access recent photos directly in Windows. Limited to newest photos, not full library.
15. Which method should I use if I care most about privacy?
USB cable (File Explorer) — zero internet, no login, full control. Or LocalSend for wireless privacy.
Transferring photos from iPhone to PC is straightforward once you pick the right method for your needs. USB is king for speed/privacy, cloud for convenience, LocalSend for wireless without accounts.